

It’s that time of year – time for s’mores! Camping, fires, even in the backyard, it’s just time to make s’mores. My kids would eat them every night if they could. We were taking our first camping trip of the season last month and being that I always like to overdo things, I thought – I should just make my own marshmallows to bring! Which I did – and they actually turned out amazing (recipe coming soon, it was eaiser than I thought), but um, I forgot them at home. All that work, just to buy them at the store while on the trip.
Anyway, when we got home, I had a giant pan of marshmallows to use up. I cut them up and froze them, and waited for a marshmallow idea to come to me. Around that time, I had just started my little microbakery and was working on new ideas for baked goods to offer. I wanted to do something seasonal, and – lightbulb – I thought S’mores Cookies would be perfect! I used my Best Chocolate Chip Cookie Recipe as a base and went from there!
Here’s how it’s done
Step 1: gather The ingredients
Start by pulling out all of your ingredients. And go to the store to buy marshmallows, ha. (You do not need to home-make marshmallows for these to turn out delicious). And then freeze them. This is key to good S’mores Cookies dotted with chunky marshmallows.

Combine the sugars in one bowl, the butter in another, then the flour, chocolate chunks, graham crackers, frozen marshmallows, and the rest of the dry ingredients in separate bowls. Pull out two eggs and get them to room temperature.
Step 2: Cream the Butter, Sugars and eggs
One crucial step in getting the dough juuust right in this recipe is getting the butter the right texture. I find that taking butter directly from the fridge and softening in the microwave until it just starts to melt makes for the perfect dough base. Take a look at the butter in the image above – your melty softened butter should look like that!
Then, dump the butter into a large mixing bowl and add the sugars. Using either the paddle attachment on your mixer, or a handheld mixer, cream the butter and sugars together until light brown in color and fluffy in texture. Add one room temperature egg and one egg yolk to the mixture, and blend until it’s beginning to hold some shape and look like it’s forming peaks.

(Why this is so beautiful to me, I do not know, but there is something very satisfying about separating an egg yolk from the white and then cupping it in the little shell.)
Step 3: Add dry ingredients
Once you have the butter, sugars, and eggs blended together, add the baking soda, salt, arrowroot powder (or cornstarch), and vanilla. I use vanilla powder, but you can absolutely use vanilla extract. Honestly, I only use vanilla powder because I have it on hand to put in my coffee in the mornings (Try it. So good), and I use it in my Snack Ball recipes.
Next, add the flour in gradually, but don’t over-mix. Once the flour is almost all blended in, add in the graham crackers and chocolate chips and give it a few stirs. Lastly, add mallows, and carefully stir these in. If you over-stir, they will get all melty and start to just become part of the dough. Trust me, it’s super frustrating.

Step 4: chill the dough + shape
Then, cover and refrigerate the dough for at least two hours, and up to overnight. When the dough is thoroughly chilled, heat your oven to 350°F, and line a cookie sheet with parchment paper. Also – I’m not sure why I had been using a “half cookie sheet” for a bazillion years, but I recently invested in a couple of full-size cookie sheets and man – game changer. Oh! And a cookie dough scoop. If you make cookies enough, I highly suggest grabbing one for even sizes and baking. This is what I use and I love it.

If you don’t have one, using a 1/8 cup measuring tool will do the trick to get you the right size. They won’t be perfectly round – that’s okay.
Step 5: Bake the cookies
Finally, bake! Space the dough balls on the baking sheet about 1.5″-2″ apart, and bake in the preheated oven for about 15 minutes or until the edges are just starting to brown. The centers might still be a bit doughy, but that’s okay.

Step 6: Cool
Leave the cookies on the sheet for 10 minutes before transferring to to a cooling rack to help finish baking. I don’t worry about the shape, but if you do, you can use the “cup trick” – while the cookies are still on the warm baking sheet, turn a cup upside down and swirl the edges of the cookies around to force the edges into a circle. A biscuit cutter will do the same thing.

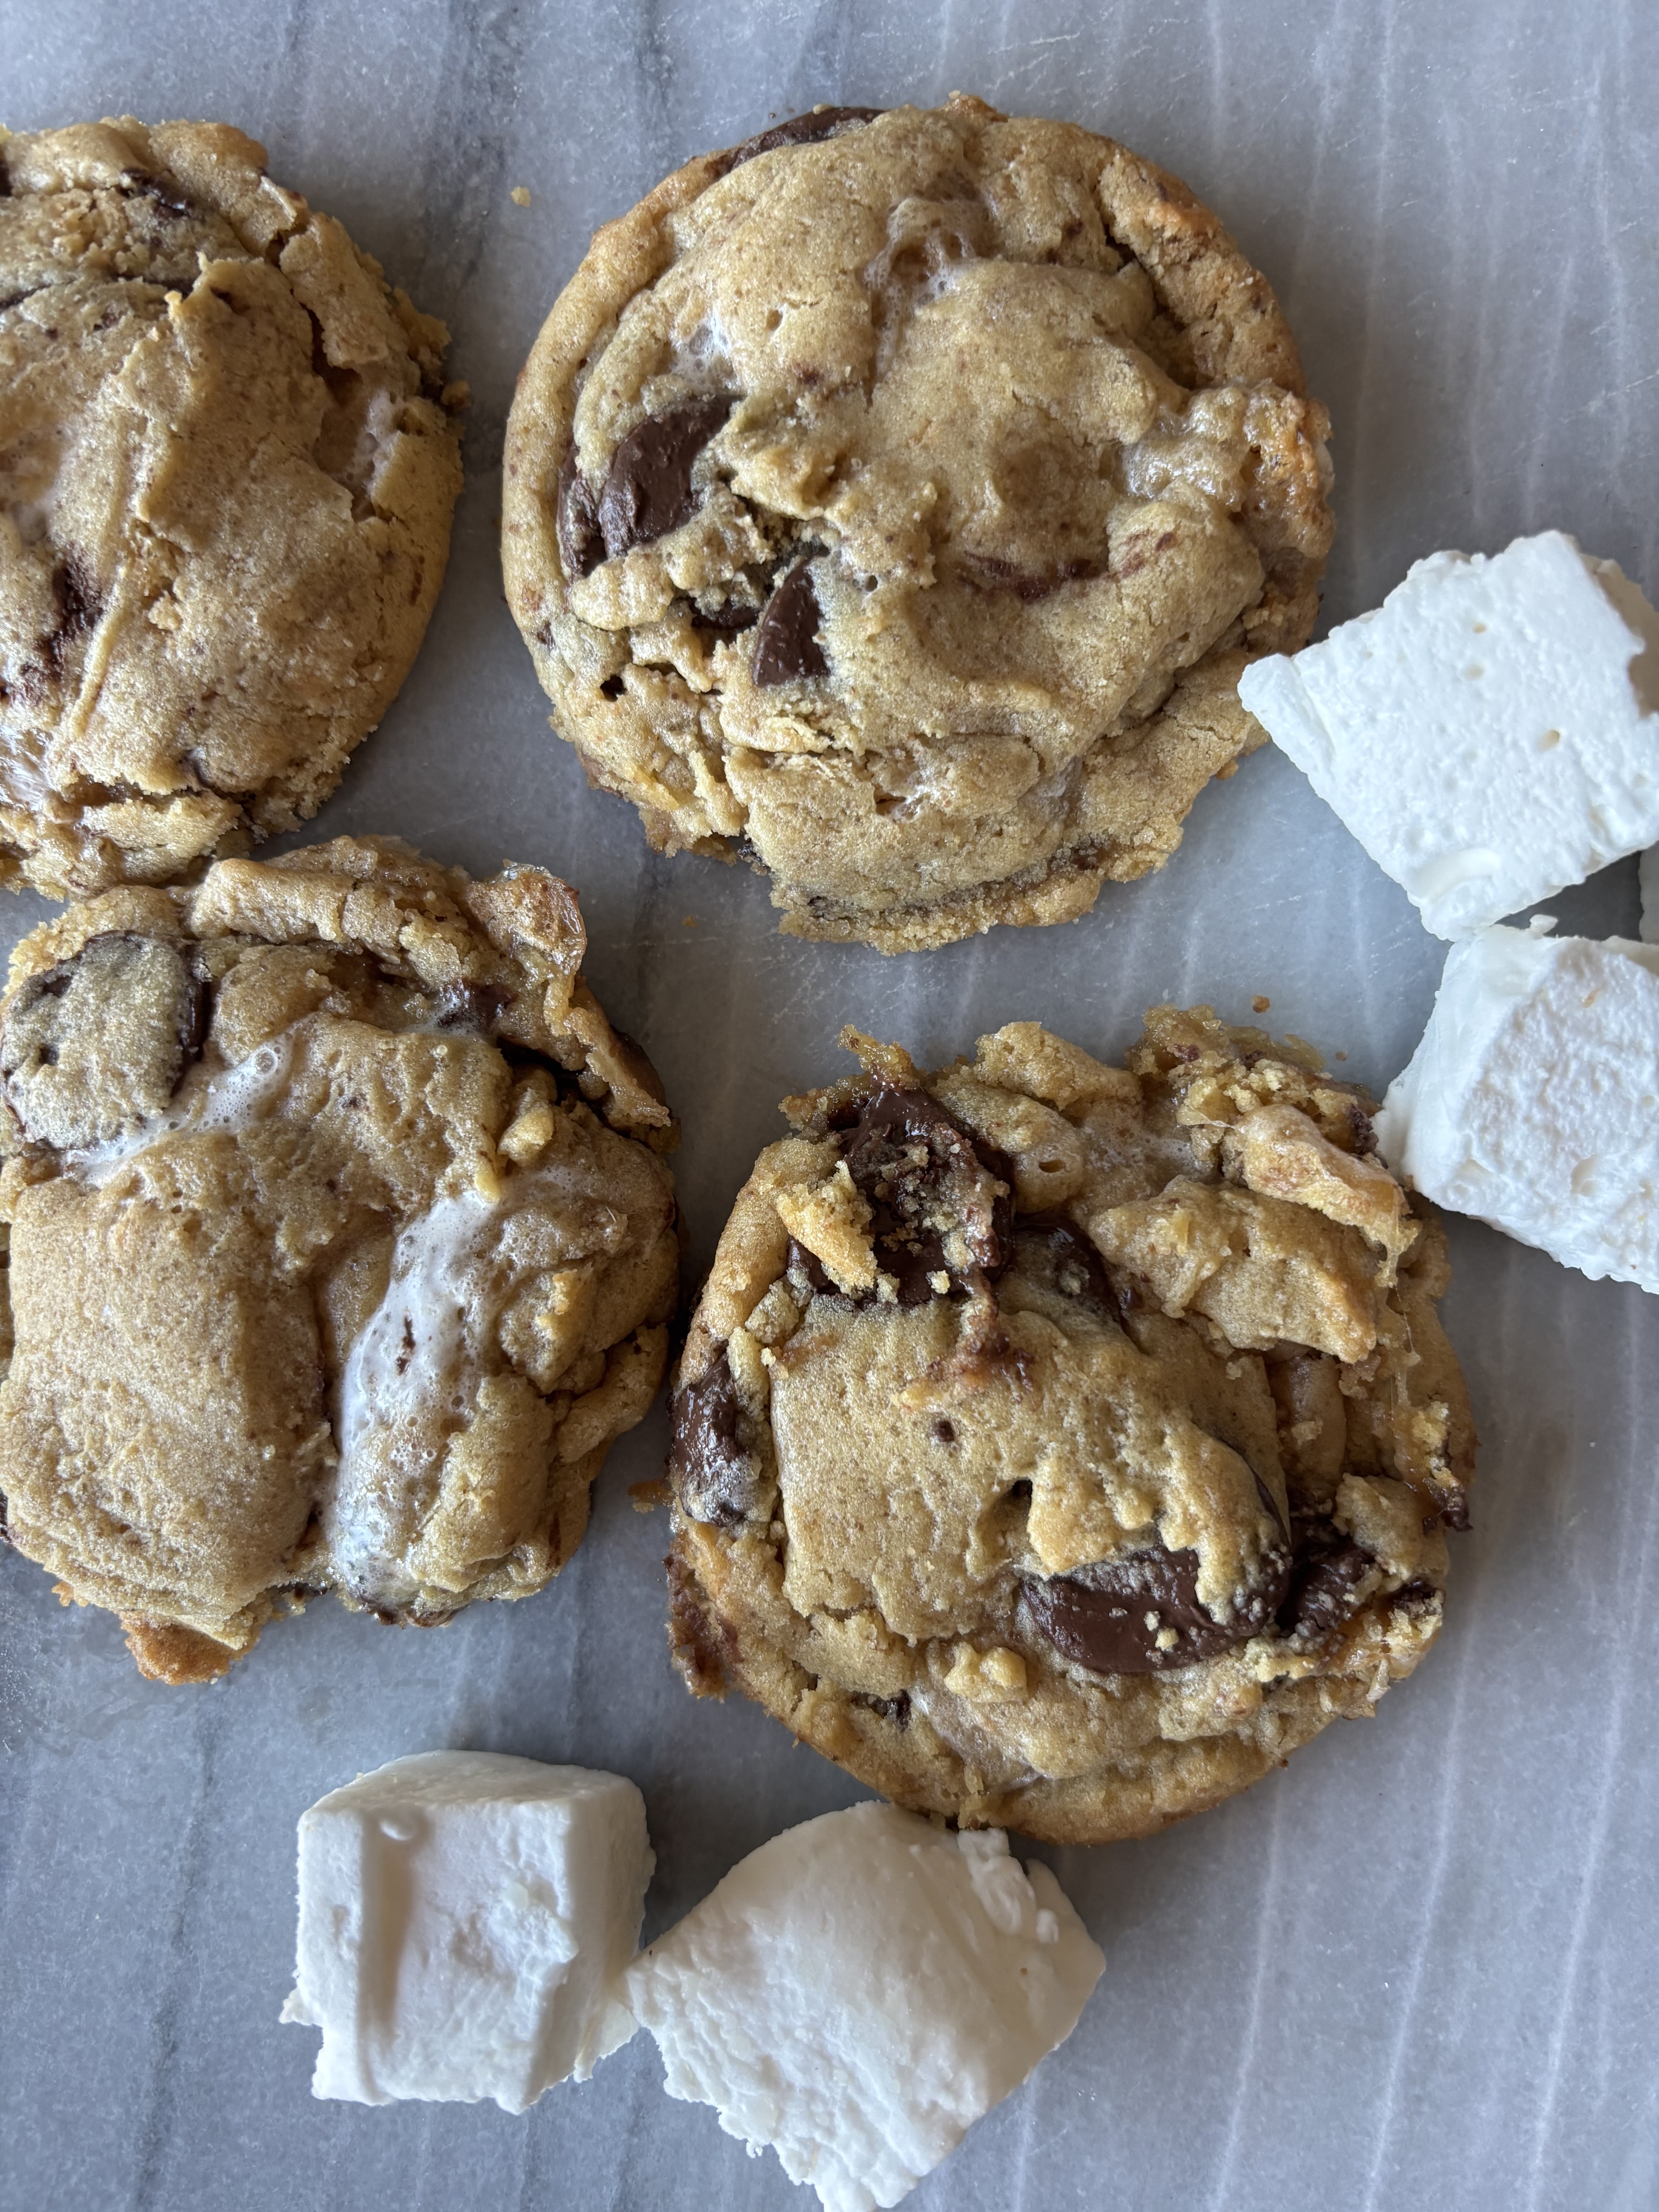
That’s it! All the yummy flavor of s’mores in a delicious cookie! Melty chocolate, caramel-y marshmallow spilling out the sides, and crunchy graham crackers throughout. Summer camp trip in a cookie.

S’mores Cookie Recipe

Equipment
- Stand Mixer or Hand Mixer
- 1 Large Mixing Bowl
- Baking Sheet
- Measuring Cups
- Parchment Paper or Baking Mat
Ingredients
- 1 cup Unsalted Butter softened well, starting to get melty
- 1 1/4 cups Brown Sugar packed
- 1/2 cup Sugar
- 1 Egg room temp
- 1 Egg Yolk room temp
- 1 1/2 tsp Vanilla Extract or Vanilla Powder
- 2 3/4 cups All-Purpose Flour
- 2 tsp Arrowroot Powder Cornstarch works, too, if you don't have this on hand
- 1 tsp Baking Soda
- 3/4 tsp Salt
- 3 Graham Cracker Sheets crushed
- 1 1/2 cups Chocolate chunks or chips (I prefer Nestle semi-sweet or dark)
- 3/4 cups Frozen Marshmallows
Instructions
- Mix butter and Sugars together in a large bowl using a stand mixer or handheld beater.
- Add egg and egg yolk to the butter and sugar, mixing and scraping down the sides of the bowl if needed until the consistency is fluffy.
- Mix in vanilla, arrowroot or cornstarch, baking soda and salt.
- Add flour 1/2 cup at a time and mix just until there are no white streaks left.
- Stir in graham crackers and chocolate chunks or chips.
- Gently stir in frozen marshmallows carefully, ensuring they don't melt and become part of the dough.
- Chill the dough in the refrigerator for at least two hours. (Alternatively, you can scoop and shape dough balls to freeze and bake later.)
- Preheat oven to 350F and line a baking sheets with parchment paper.
- Remove dough from the refrigerator and scoop, using a 2 oz scoop or 1/8 cup measuring tool (you can just eyeball this is you don't have either – it's about the size of small scoop of ice cream) and place 1.5"-2" apart on the baking sheet.
- Bake about 13-15 minutes, removing the cookies from the oven just as soon as the edges turn light brown. If they are still gooey in the center, that's ok! Leave them on the baking sheet to cool for about 10 minutes, and they will finish baking.
- If your marshmallow is spilling over the sides too much, use the "cup trick" to gently encourage the mallow to become part of the cookie. Take a cup and turn it upside down, place it over (and around) the cookie, and swirl the cup around. This will bind the cookie together.
Notes
- It is so important to remember to freeze the marshmallows beforehand, and ensure that they are totally frozen prior to adding them to the dough. If they aren’t they will quickly separate and sort of melt into the dough. Even after chilling, the cookies will spread in the oven too much. Freeze ’em!



Leave a Reply